The kitchen island has evolved from an optional prep counter into the undisputed command center of the modern home. In open-concept floor plans, it bridges the culinary work zone with the surrounding living space, serving as an everyday dining table, homework station, morning coffee bar, and buffet for entertaining. When real estate within the home is at a premium, the most successful islands are the ones that work double duty: packing concealed, accessible storage on one side while providing comfortable, ergonomic seating on the other.
Merging high-capacity cabinetry with seating requires a thoughtful balance between room proportions, leg clearance, and storage access. A poorly planned island can easily become an awkward, bulky roadblock that disrupts the natural flow of your cooking triangle. With proper planning and intentional design choices, you can create a centerpiece that delivers abundant utility without sacrificing clean, contemporary aesthetics.
Master the Proportions of Countertop Overhangs and Legroom
The primary engineering challenge of designing an island that includes both cabinets and bar stools is carving out adequate space for human knees without encroaching on cabinet volume.
-
Standard overhang depths: For a standard 36-inch counter-height island, you need a minimum overhang of 12 inches for comfortable legroom, with 15 inches serving as the preferred luxury standard. A 42-inch bar-height island requires slightly less depth, around 10 to 12 inches, because legs hang at a steeper angle.
-
Structural support brackets: Countertop materials like quartz, granite, and marble are heavy and brittle. Any stone overhang extending beyond 9 to 10 inches requires hidden steel cantilever brackets fastened directly into the cabinet frame to prevent the stone from snapping under downward pressure.
-
Per-person width allowance: Plan for a minimum of 24 inches of horizontal width per seated person. If you intend to use wide, upholstered bar stools with arms, increase this spacing to 28 or 30 inches per seat to prevent guests from bumping elbows.
Calculating these clearances early ensures that your kitchen maintains fluid traffic flow even when every stool is occupied.
Integrate Deep Drawers and Pull-Out Pantries on the Working Side
To keep the seating side quiet and uncluttered, position all primary cooking storage exclusively along the interior-facing working side of the island, opposite the main range or sink.
-
Full-extension pot and pan drawers: Lower base cabinets with static shelves require you to get on your hands and knees to find cookware buried in the dark. Replace them with deep, 30-inch or 36-inch wide full-extension drawers that glide forward completely, exposing your entire inventory at a glance.
-
Vertical tray dividers: Dedicate a narrow 9-inch or 12-inch pull-out compartment near the prep zone for cookie sheets, cutting boards, and cooling racks stored on their long edges.
-
Concealed pull-out waste and recycling stations: Stashing double garbage and composting receptacles inside a pull-out cabinet directly next to the prep sink keeps unsightly waste out of sight while making meal clean-up seamless.
-
Undercounter drawer microwaves: Stashing the microwave beneath the countertop on the working side frees up valuable perimeter counter space and keeps hot food prep away from children running through common walkways.
Prioritizing heavy-duty soft-close drawer glides rated for 75 to 100 pounds ensures these storage zones slide smoothly even when filled with cast-iron skillets.
Create Recessed Seating Niches with Shallow Back Cabinets
In deep island footprints measuring four feet or wider, there is ample space to place storage beneath the seating overhang itself, transforming unused cavity space into functional cabinetry.
-
Shallow push-latch doors: Install a bank of shallow 12-inch-deep cabinets along the backside of the island, set beneath the countertop overhang. Use push-to-open latches rather than protruding handles so seated guests do not bump their knees against hardware.
-
Store occasional tableware: This back-of-island storage zone is ideal for items used only a few times a year, such as holiday platters, punch bowls, fondue sets, and extra cloth napkins. Simply slide the stools out of the way when access is needed.
-
Recessed knee wells: Instead of a full-length row of cabinets, consider boxing in cabinets on the outer left and right flanks of the island, leaving the central section open as an indented knee well. This creates a balanced, architectural silhouette with a dedicated dining slot.
This dual-sided cabinet arrangement maximizes every cubic inch of the interior frame without requiring an overly wide overall room footprint.
Frame the Island with a Dramatic Waterfall Countertop
A waterfall edge, where the slab extends horizontally across the cabinetry and drops vertically down the sidewall to the finished floor, remains a signature hallmark of contemporary design.
-
Visual framing: The continuous stone edge frames your seating zone, visually separating casual dining from surrounding high-traffic hallways.
-
Protecting high-wear corners: Wooden island end panels often collect scuffs from kicked shoes, pet scratches, and vacuum strikes. A durable quartz or quartzite waterfall panel creates an impenetrable, easy-to-clean outer shield.
-
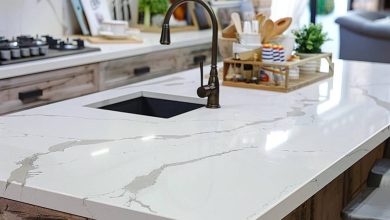
Bookmatched veining: When using heavily veined marble or porcelain slabs, ensure your fabricator bookmatches or miter-cuts the seam at the edge. Continuing the natural vein flow down the vertical fall produces an uninterrupted, sculptural appearance.
Waterfall counters can be carried down both sides of an island or placed exclusively on the side visible from the entryway to establish an immediate focal point.
Incorporate Open Display Shelving and Wine Cubby Accents
A solid, continuous block of painted cabinetry can sometimes look heavy in smaller, transitional kitchens. Introducing selective open nooks adds warmth and casual texture while breaking up solid paneling.
-
End-cap bookshelves: Turn the exposed short end of the island into a shallow built-in bookcase to display cherished cookbooks, ceramic mixing bowls, or folded woven linens.
-
Integrated timber wine racks: Building a lattice grid or horizontal cubby run into the island base keeps wine bottles positioned horizontally at room temperature while adding organic wood tones to painted cabinets.
-
Contrasting wood accents: Line the interior of open niches with natural rift-sawn white oak or rich walnut. The contrast against white, navy, or sage cabinetry adds layered sophistication.
Keep open storage intentional and styled with minimal pieces to prevent everyday dust from creating maintenance headaches.
Design Curved, Banquette, or T-Shaped Extended Islands
Standard linear islands with all stools facing in a single row can feel transactional, like sitting at a commercial diner counter. Modifying the geometry of the island encourages natural conversation and intimacy.
-
Curved half-circle overhangs: Rounding the seating edge of the island allows people to face one another at gentle angles rather than staring straight ahead into the cooktop.
-
Integrated low-height banquettes: Build a custom upholstered banquette bench right against the backside of the island cabinets, paired with a standard dining table and chairs. This provides comfortable family dining height while borrowing back-to-back support from the central kitchen cabinetry.
-
T-shaped table extensions: Extend a wooden dining table perpendicular to the center of the kitchen island. This distinct bi-level layout separates wet culinary prep on the counter from the lowered wood dining surface where guests can relax without dodging water splashes.
These non-linear layouts turn your kitchen island into a genuine communal dining destination that comfortably replaces a formal dining room.
Conceal Electrical Outlets and Tech Hubs
Building codes require electrical outlets on kitchen islands, but exposed plastic switch plates right in the middle of a decorative wood panel disrupt clean lines.
-
Pop-up column outlets: Install flush-mounted metallic pop-up sockets that sit completely flat with the countertop surface when not in use. A gentle press reveals standard electrical outlets and high-speed USB ports for laptops and small appliances.
-
Under-counter hidden raceways: Tuck horizontal outlet strips directly underneath the upper lip of the countertop overhang, angled downward so they are entirely hidden from standing sightlines.
-
Dedicated tech drawers: Wire an enclosed base drawer with an internal safety shutoff outlet strip. This allows household members to charge cell phones, tablets, and smart devices overnight inside a closed drawer rather than sprawling cables across the counter.
Planning out electrical access allows the island to transition smoothly from an afternoon work zone to an evening entertaining bar.
Frequently Asked Questions
What is the minimum aisle clearance needed around an island with seating?
The National Kitchen and Bath Association recommends a minimum walkway clearance of 42 inches in single-cook kitchens and 48 inches in multi-cook kitchens. On the seating side of an island, aim for 48 to 54 inches of aisle space if there is a primary walkway or doorway behind the chairs, ensuring others can walk past without squeezing around seated people.
Is it safe to place a main cooking range on an island that has bar seating?
While ranges can be installed on islands with seating, safety demands strict planning. Maintain at least 12 to 18 inches of safety buffer space behind the range before the seating edge begins, or install a raised 6-inch backsplash riser to shield seated family members from hot grease splatters and boiling water steam.
Can I mix different cabinet colors or countertop surfaces on the kitchen island?
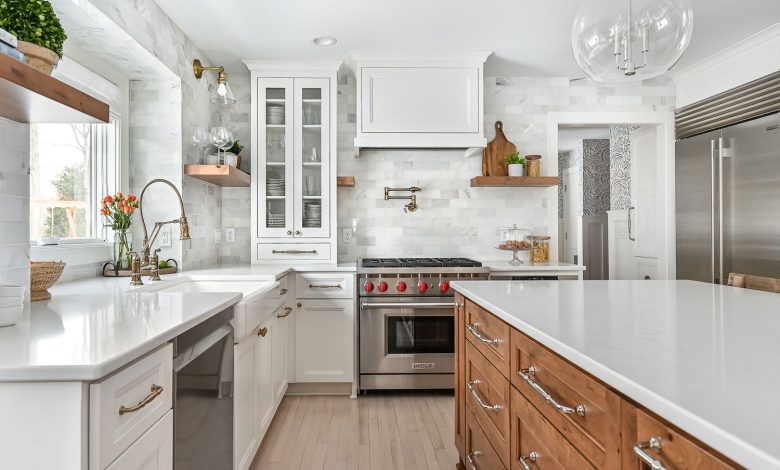
Mixing finishes is a classic contemporary technique. It is common to specify stained white oak or deep charcoal for the island base while using soft off-white perimeter cabinetry. Similarly, pairing an eye-catching veined marble on the island with subtle, durable matte quartz on the perimeter counters establishes the island as the room’s sculptural centerpiece.
What stool height should I buy for a standard kitchen island?
For a standard 36-inch counter-height island, choose counter stools with seat heights measuring 24 to 26 inches off the floor. If your island incorporates a raised 42-inch bar ledge, choose bar stools with seat heights measuring 28 to 30 inches off the floor to preserve comfortable 10-to-12-inch lap clearance beneath the stone.
How do I clean and maintain natural wood accents built into an island?
Clean wood elements like oak bookcases, integrated butcher block ends, or wine cubbies with a soft microfiber cloth lightly dampened with mild, pH-neutral soap and water. Never saturate the timber, and wipe it dry immediately. For unsealed butcher blocks used for active food prep, apply food-grade mineral oil once a month to prevent the wood from drying or splitting.
Can an existing kitchen island without an overhang be modified to add seating?
Yes, you can often extend seating by ordering a new, deeper countertop slab that cantilevers past your existing island base, provided you reinforce it with concealed steel support brackets. Alternatively, a carpenter can build a low, custom dining banquette or table extension securely anchored to the rear panel of your current island cabinets.
Is a center sink better than an offset sink on an island that includes seating?
An offset sink is usually more functional on an island with seating. Shifting the sink toward one end of the island leaves a large, unbroken expanse of continuous countertop along the center and opposite end, providing generous space for homework, food prep, and buffet serving without dirty dishes invading the dining zone.